The Kitecleat remains in position either on your lines or on your harness / boardshort , thereby can’t be ever forgotten. (except for its max. 21 grams). Your kite knife become a real used and handled accessory…
Overview off Kitecleats functions
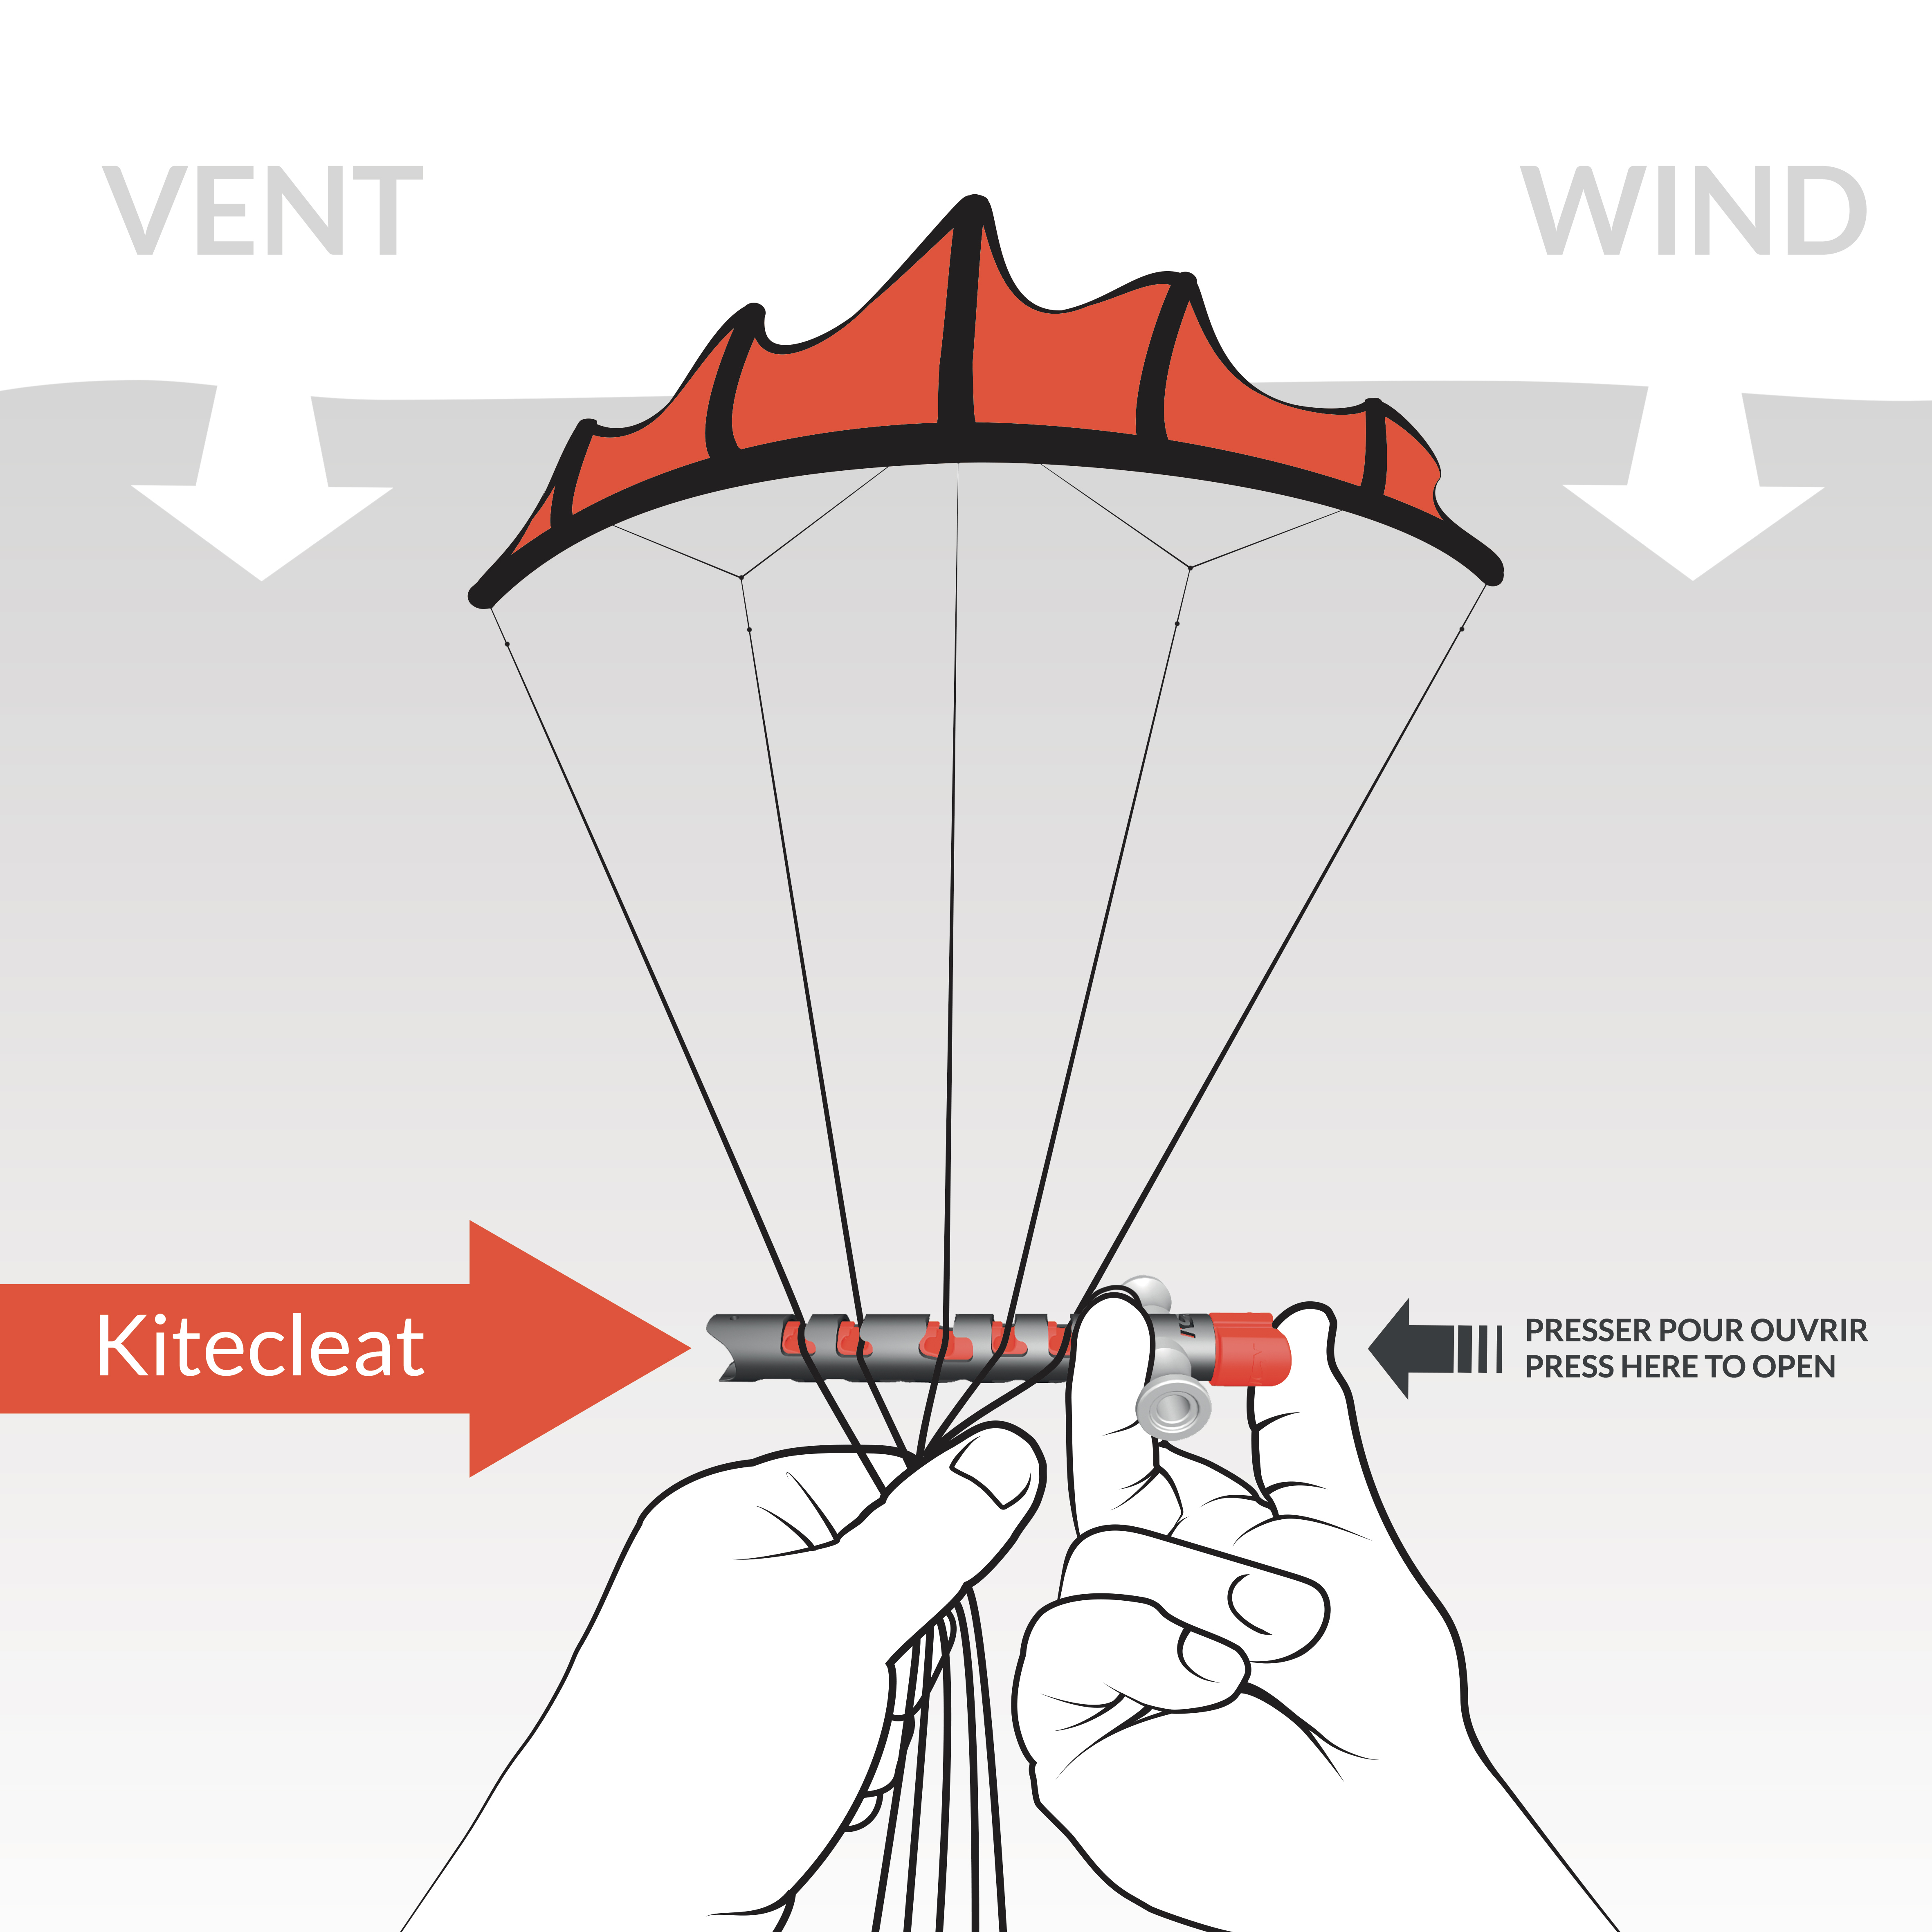
Kitecleat has been designed to be quick and easy to use in its line manager function. All you have to do is to catch your lines in it prior to disconnect your kite to save the right positions of your lines. Time after, you’ll have only few meters to be untwist instead of 25!
Posted in Usage
Line position holding function
Maintain of line positions when disconnecting the kite from the bar. Prevents from having to extend its lines to untwist them after a transport.
Advantages:
– Time saving : Implementation of the lines in less than 5 seconds.
– Reliability Gain: Incorrect assembly (spinning front / rear line) not possible.
– Possibility to take off from a small space that don’t allow lines deployment
(small spot, frequented or boat for example).
Warning:
You must ensure you do not pass line(s) into the chicken loop side of the bar where you roll / unroll them. To be sure, you can stay hooked to your harness when rolling/unrolling lines.
Posted in Usage
Line cutting function
If necessary, in an emergency situation, the use of a line cutting tool can be carried out quickly only if you are used to grasping and handling it.
To my knowledge, the Kitecleat is the only small easily graspable and
line cutting tool manipulable with a single hand and in one motion.
With a leash which is released “automatically” when it is well taken in hand (in the fist, between two fingers, no matter which).
Advantage:
– The effectiveness of the Kitecleat in its line cut function comes from the fact that by using it at each session for its cleat function, handling becomes instinctive.
– Training is always a critical matter in emergency situations.
Posted in Usage
Use advices – Line cutting tool
- To be fully effective in this function, the kite cleat must be accessible from either hands.
- Put it in the same place (harness or boardshort) and always in the same direction. So you will know the side of the blade even with your eyes closed (or open in salt water or sand).
- To grasp it, you must fit two fingers under the lugs and close your fist on the push to release the leash and open the blade line compartment in the same movement.
- The aperture may seems small, but its shape enables the line to penetrate even at an angle. You then just have to “scratch” the line, preferably in tension.
- Dyneema or Spectra line has no core and has the distinction crashing to a few tenths of a millimetre without damage, whatever are the initial diameter (1.5 to 3mm for pre-lines). Therefore the space between the blade and guide is very small, in order to spread maximum of line on the edge of the blade.
Posted in Usage
Ends of lines fixing
If you wish, properly fix the ends of lines and avoid so the potential appearance of knots at the end of the longest of your lines.
Advantage:
Obviously optional but + 50% of kiters meet this problem which unbalances the wing and halves the line resistance.
These knots, once tight, can be difficult to remove without damaging the line.
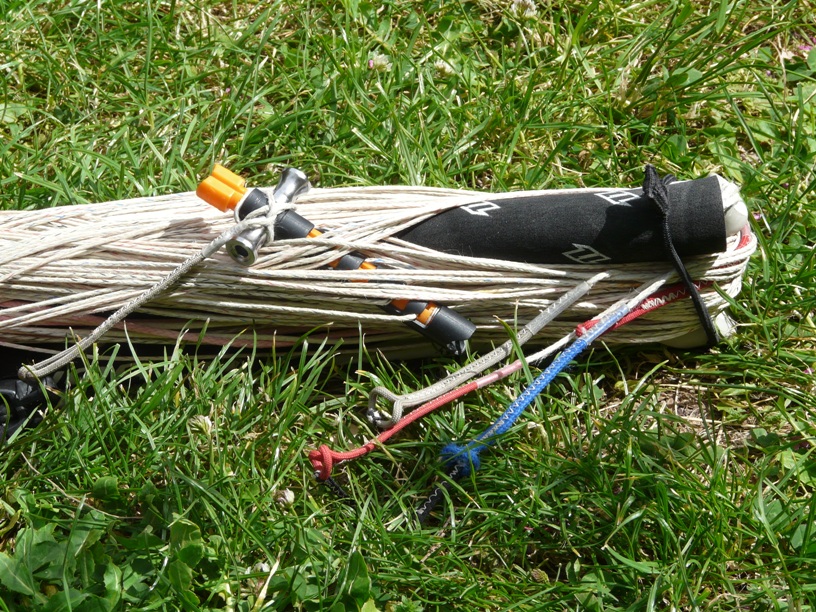
I can only recomand to roll the longest one passing it trough the locking notch like on following picture:
Posted in Usage
Use advices – Lines position holding
The Kitecleat delivers your kite lines in position to reconnect your wing but you must ensure you do not pass line(s) to the chicken loop side while you roll / unroll them.
Tip: To avoid problems, if you are not already a confirmed kiter, I can get you to proceed as follows (just logical and intuitive process to be adapted to your preferences).
Arriving on the spot:
- Inflate your kite, laying it on the ground, facing the wind.
- Take your bar, position yourself behind your kite, unroll a few meters lines before putting back in place a maintaining lines elastic of your bar. Drop it to the ground.
- Get ready for kiteboarding (various accessories), get your harness without tightening the loop.
- Connect your wing in the position given by the Kitecleat.
- Get the kite cleat and stow it on your harness or boardshort.
- Fasten your harness.
- Connect the chicken loop of your bar to the hook of your harness. Doing so, you will not be able to pass line(s) to the chicken loop side by precipitation or inattention.
- Remove the elastic and unroll your lines by walking crosswind.
- Arrived at the end of the lines, connect your kite leash and adjust your brake.
- Ask a kiter to put your kite in position for take-off and not let go before your signal.
- Stretch your lines slightly and makes the required bar turn if needed. (Zero to two turns with a minimum of care).
- Last re-check (trust does not exclude control), make a sign that you are ready to take off.
- Recover your board and go kiteboarding.
Coming back:
- Land your kite.
- Stay hooked and roll your lines until you get few meters behind your kite.
- Put in place a maintaining lines elastic of your bar.
- Grasp your Kitecleat and lock the lines into each compartment in the position given by your kite. (No cross lines between Kitecleat and kite).
- Unhook your bar from the harness, drop your bar to the ground, Kitecleat on top of it to avoid as much as possible the sand.
- Disconnect your wing.
- Finish to roll the last few meters of your lines sliding the Kitecleat to the end of the shortest one.
- If you wish, properly fix the ends of lines on the Kitecleat. I recommend to use at least the longest one to lock the closed position of the Kitecleat.
- Finish storing your kiteboarding equipment.
Posted in Usage
Use advices – The sand
The Kitecleat has been designed (specially V2 and V3 models) to let the sand go through. If you have any problem with a V1 model, please contact me, I’ll send you some casing spare parts to upgrade your Kitecleats for free (delivery cost only).
Posted in Usage
Use advices – Kitecleat locking
The Kitecleat is closed in action default.
However, to be sure it does not open during the transport or storage of your kite, I recommend using the longest end of the lines to lock it in the closed position by passing it in the groove provided for this purpose (among others), even if you do not want to wrap all the extremities of your lines on the Kitecleat.
Posted in Usage
Use advices – Stowage on waist harness
The Kitecleat must be firmly secured to your harness but it should be also easy to catch and release.
Following are examples of possible stowage depending on your harness type (waist / seat), your navigate way (smooth / engaged) and of course your preferences.
WARNING: In any case, the elastic is here to pull the kitecleat inside its “pocket”, this way to attach it is not correct, risk is to loose it if it cames out. If you are an advanced rider, please use the (provided) leash to secure it. This leash can easily be broken in case of emergency.
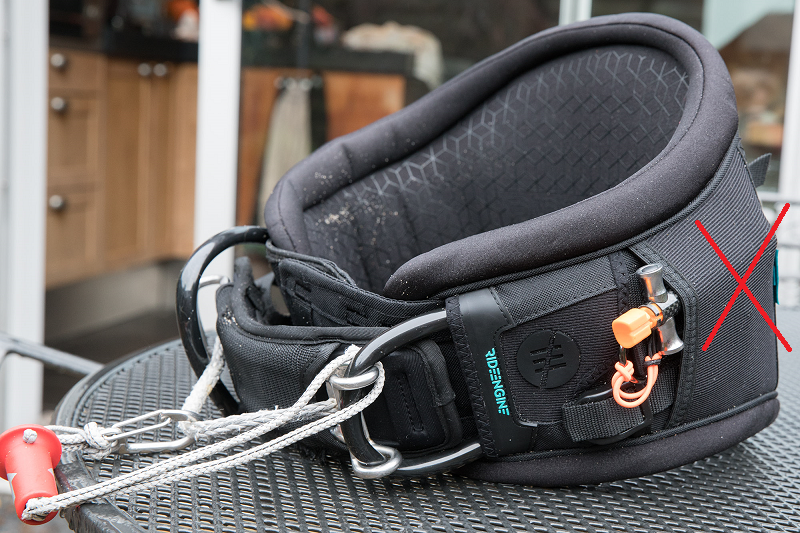
Always prefer this kind of attachement:
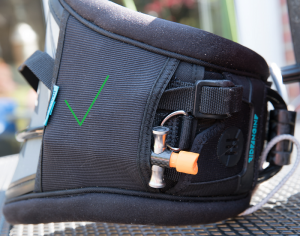
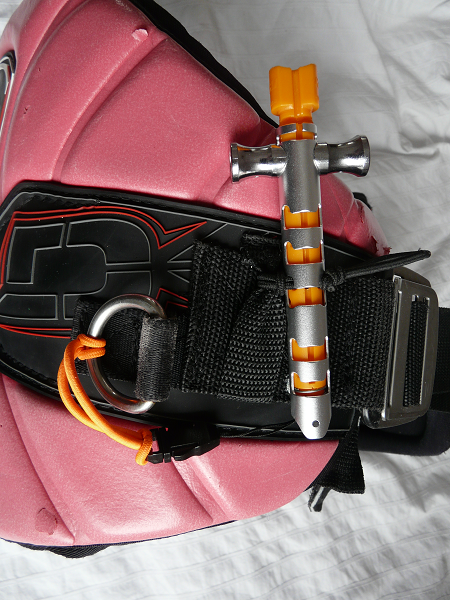
First: In the belt: Most universal and modular (for belt harness)
Advantages:
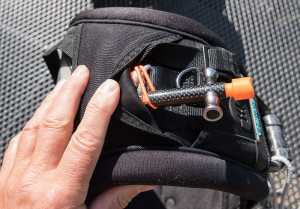
– Allows the grip of the Kitecleat with one hand but also possibly the other because you never know…
– You will find yourself instinctively with the Kitecleat in your fist, the line cut compartment in open position.
Posted in Usage
Use advices – Stowage on seat harness
Behind a strap loop (seat or waist harness)
Advantages:
– Allows the grip of the Kitecleat with one hand but also possibly the other because you never know…
– You will find ourselves instinctively with the Kitecleat in your fist, the line cut compartment in open position.
Posted in Usage
Use advices – Harder stowage on harness
For engaged (or hazardous !) way of riding with any harness type.
Advantages are the same, maybe a little bit more “difficult” to take out, if you find your Kitecleat moving or uncomfortable in previous positions, please give it a try.
Posted in Usage